Mass Texting Service Knowledge Base
Getting Started With Mass Texting Service
Table of Contents
Before you get started with the Mass Texting Service app, it’s important to first get acquainted with the layout of the dashboard. The dashboard is comprised of seven different tabs: home, contacts, groups, keywords, forms, schedules, and messages. We’ll break each tab down for you – explaining the layout and function of each tab in the dashboard. You can read the breakdown or watch the video above to learn more about the dashboard.
In addition to navigating the dashboard, we’ve also put together guides walking you through all of the different activities you can perform with Mass Texting Service. You can view all of our activity guides below.
Activity Guides
How To Upload Contacts
How To Create Groups & Segment Contacts
How To Send Mass Texts
How To Schedule Mass Texts
How To View & Respond To Two-Way Texts
How To Use Keywords
How To Create And Embed Forms
Modifying Or Cancelling Your Subscription
Understanding The Dashboard Tabs
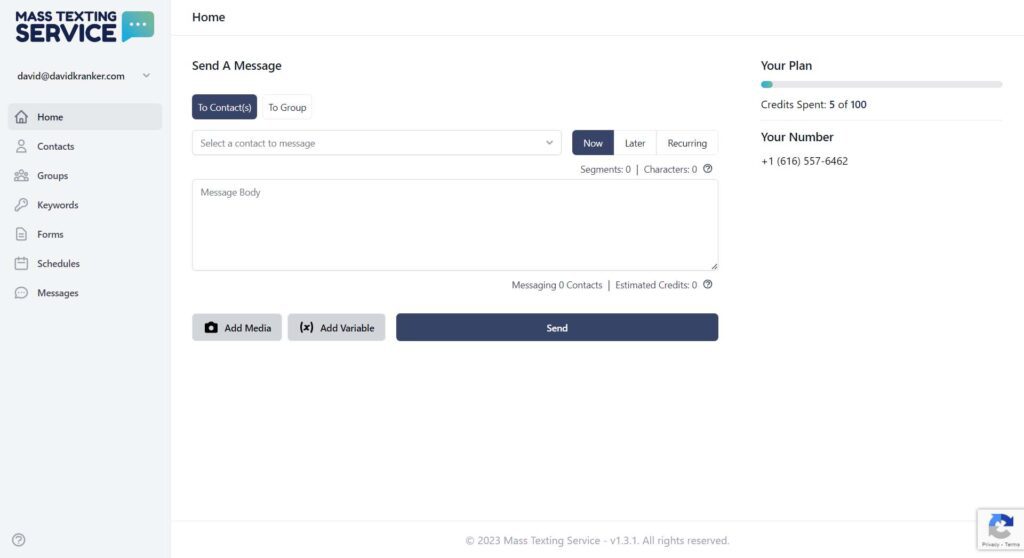
The Home Tab
The home tab is the first tab you’ll see when you log into the Mass Texting Service app. The home tab allows you to jump right into sending mass texts.
You can send a text to a specific contact or group of contacts. The buttons to the right of the contact selection box allow you to choose whether you’d like to create a text to send immediately, later, or on a recurring interval.
The message body input box is where you’ll type up the text message that you want to send. As you type the counters will keep track of how many characters and segments your message is, as well as, how many of your plan credits your text will use. You can add an image, gif, or video to your text with the “add media” button. You can also customize your text to include the names of your contacts using the “add variable” button.
On the right side of the home screen you’ll see your plan details – including the number of monthly credits you’ve used and the number of credits you still have available. You’ll also see your dedicated text marketing number, which you’ll use to send and receive texts from.
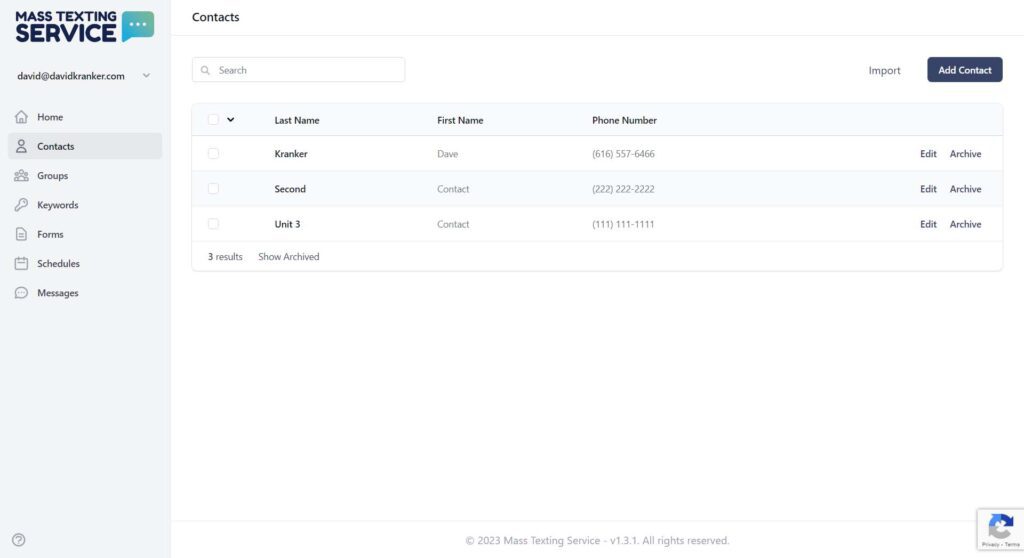
The Contacts Tab
The contacts tab is where all of your subscribed marketing contacts will be housed. You need to add contacts to the app to be able to text them from the app. You can use this tab to search through your contacts, add new contacts, archive contacts, and add contacts to groups.
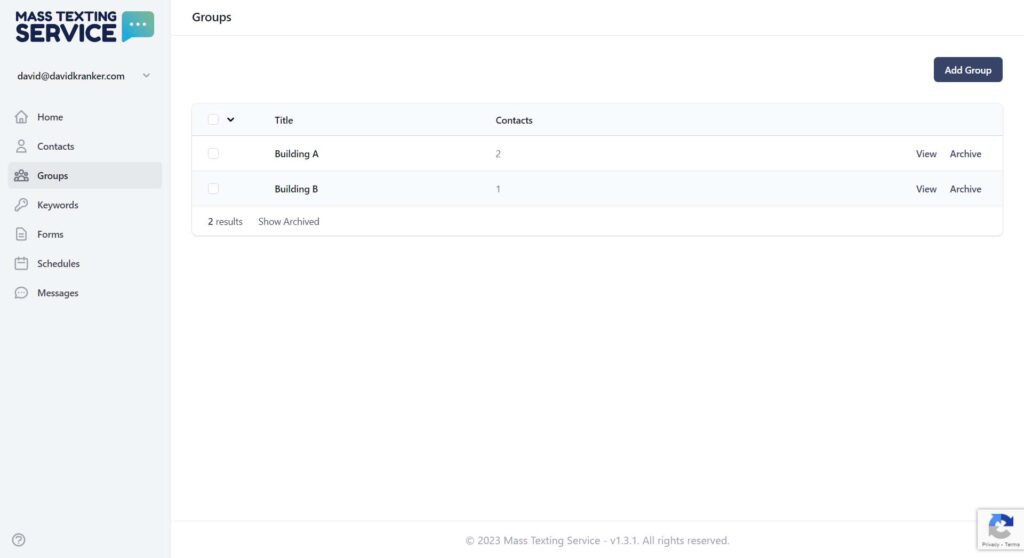
The Groups Tab
The groups tab is used to segment your contacts into different audiences. When you create groups, you’ll be able to send specific texts to individual groups instead of sending texts to your entire contact list.
You can use the groups tab to create and archive groups. You’ll also be able to see the list of contacts that belong to each group when you click on the “view” button next to the group name.

The Keywords Tab
The keywords tab is used to create keywords that individuals can text to your dedicated text number to automatically subscribe to specific groups.
As an example, if you’re an artisan maker attending a candle event to sell your custom candles, you could create a keyword “candle” and have attendees text “candle” to your number to automatically subscribe them to your candle event list. This way you can text the attendees any event-specific discounts or promotions.
You can use the keywords tab to create your group opt-in keywords and select which group each keyword will be assigned to. You can edit your keywords at any time. You’ll also be able to archive keywords that are no longer relevant.
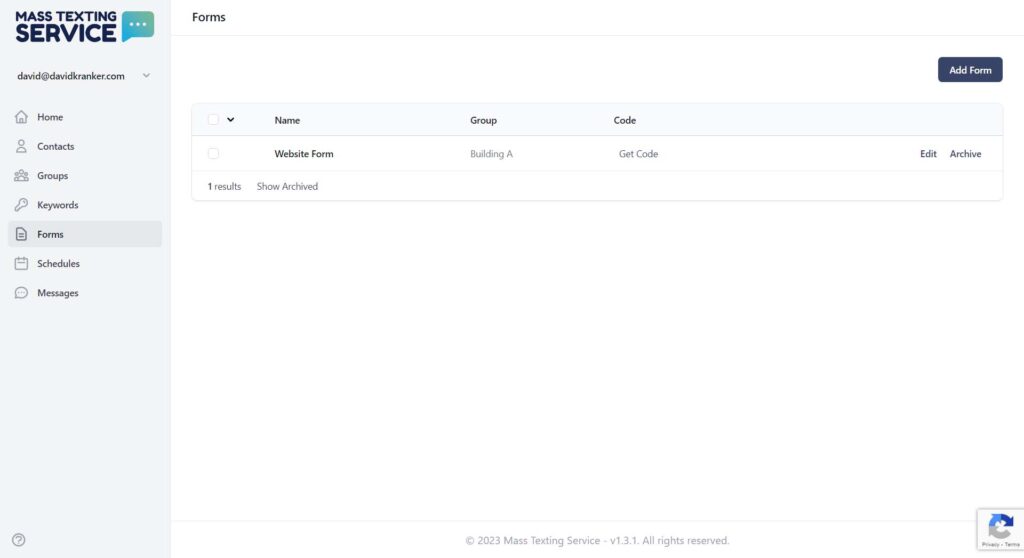
The Forms Tab
Want to have site visitors subscribe themselves to your text updates? You can use the forms tab to create text subscription forms that you’ll be able to embed on your website.
Once you create your form you’ll be able to copy and paste the code to embed it wherever you’d like. You can either embed a link to your form, or you can embed the entire form on your site. Forms will subscribe users to a group you select. You can create multiple forms if you have multiple groups you’d like to subscribe different users on different pages to.
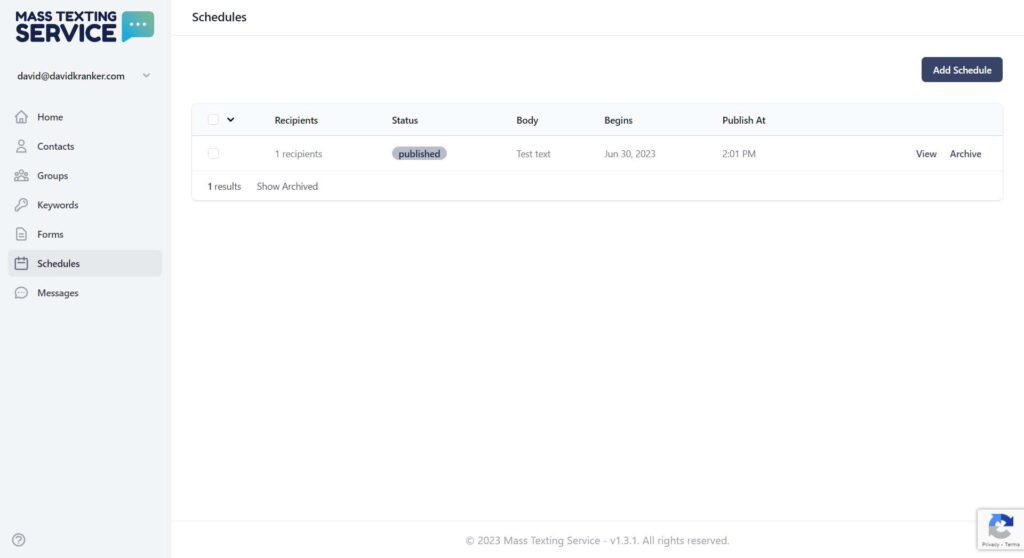
The Schedules Tab
You can use the schedules tab to create and view scheduled texts. You can press the “add schedule” button to create a scheduled mass text.
You’ll be able to view all of your past scheduled texts and the contacts they were sent to. You can also archive scheduled texts, which is useful for recurring texts you no longer want to send.
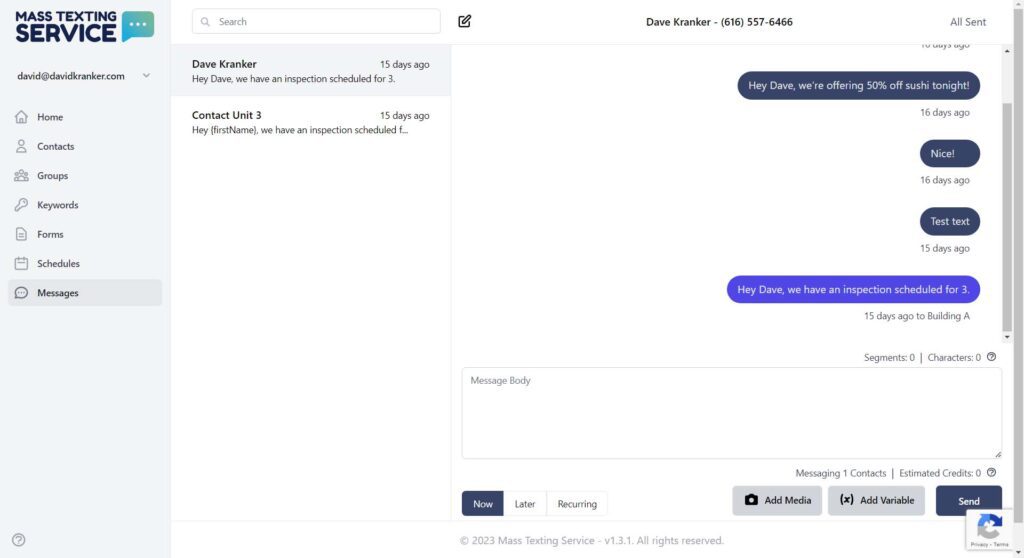
The Messages Tab
The messages tab is where you’ll engage in two-way texting. Any responses or texts you receive to your dedicated text number will show in the messages tab. An email will be sent to the email associated with your account when a new inbound text is received to your dedicated text number.
You can search through texts and click on text conversations to read the messages and respond. The messages tab lets you see new messages in real-time, but you don’t have to respond in real-time. You could always schedule your response for a later date or time. Inbound texts won’t cost you any text credits, but responding to texts will use your credits.