How To Use Keywords In Mass Texting Service For Contact Subscription
Table of Contents
Keywords give your audience an easy way to subscribe to specific groups. In this guide we’ll cover what keywords are and how to create and edit them.
How Keywords Work
A keyword in Mass Texting Service is a word that can be texted to your dedicated account text number to automatically subscribe the sender to a group. Keywords can lead to more engaged subscribers because the contact has to take the initiative and text the keyword to opt-in.
As an example, you may be a realtor hosting an event on buying rental properties. You might want to subscribe attendees to a group to text them exclusive tips and property listings that won’t go to the rest of your contact list. You could create a Group called “Rental Property Event” and assign a keyword of “Landlord” to the group. During your presentation, you can feature a slide encouraging attendees to text “Landlord” to the number associated with your Mass Texting Account. When an attendee texts “Landlord” to your number, they’ll be automatically subscribed to your Rental Property Event Group.
Every keyword you create will be associated with a group in your account. You can create an unlimited number of opt-in keywords for each group in your account. This is beneficial, because you may want to use different keywords for different events or occasions.
How To Create Keywords
To create keywords, you’ll want to first navigate to the keywords tab. In the sidebar menu on the left side of the app screen, click “Keywords”. You’ll then be taken to the keywords tab of the app.

Any keywords you create will show up in the keyword table in the keywords tab. The table will display the keyword along with the group that the keyword opts users into.
You can press the blue “Add Keyword” button in the top right of the keyword tab view to create a new keyword. When you press the button, a new window will pop up.
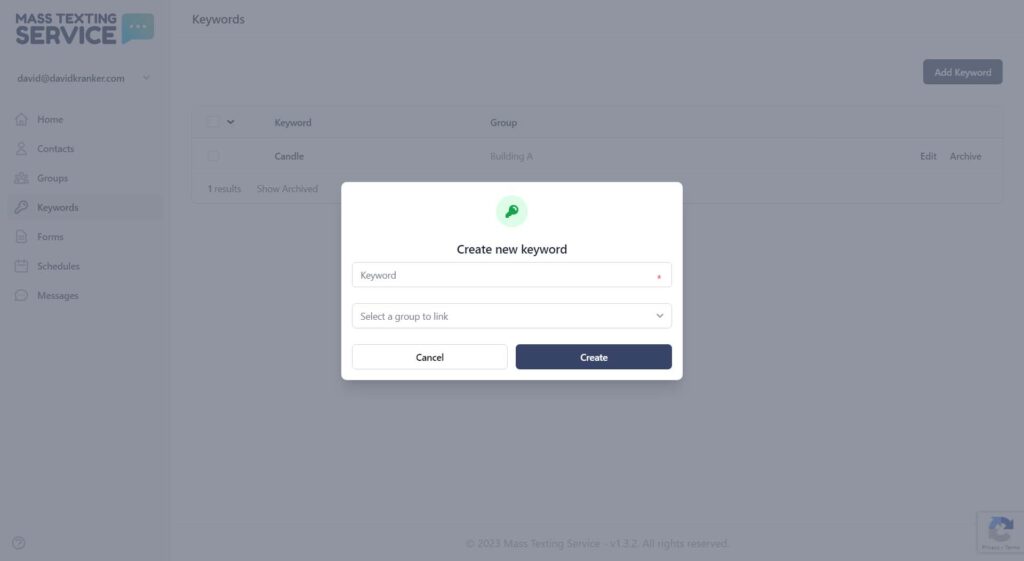
You can enter your keyword in the keyword input box and select the group you want the keyword to be associated with using the select a group dropdown. Once you’ve entered your keyword and selected your group, you can press the “Create” button to create your new keyword.
How To Edit Keywords
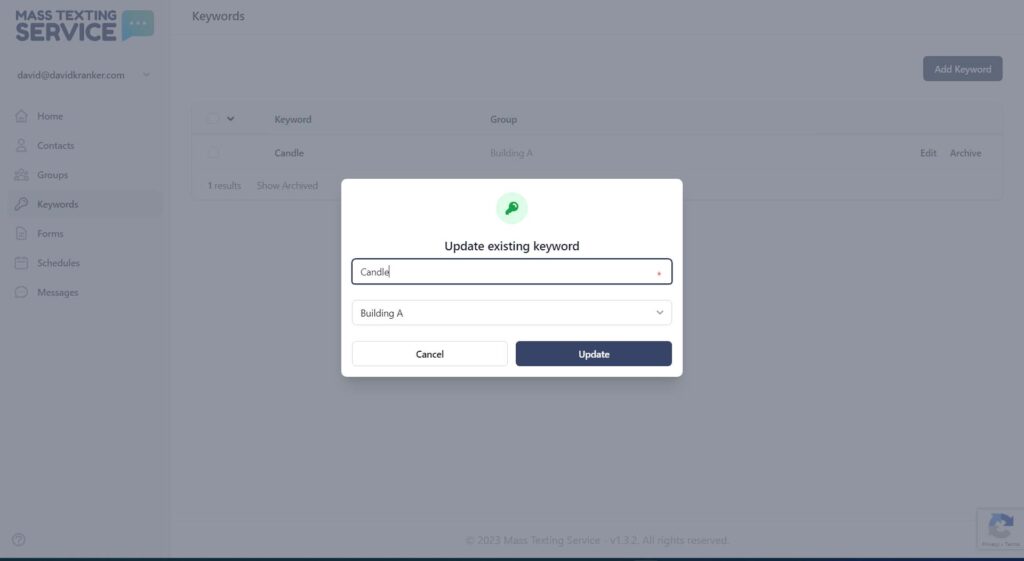
You have the ability to edit or archive any keywords you create. You’ll see all of your existing keywords in a table format in the keywords tab. There are two links (Edit and Archive) to the right of each keyword in the table. You can click the “Edit” link next to any keyword to modify the keyword or change the group the keyword is associated with.
The time may come when you eventually no longer want to use a specific keyword. You can archive the keyword to prevent individuals from opting into a group with it. The “Archive” link will send the keyword to your archived list where it will no longer serve as an opt-in keyword. Archived keywords are inactive, but not gone from your account. You can view your archived keywords by pressing the “Show Archived” link at the bottom of the keywords table. You’ll be able to restore or delete archived keywords from the archived keywords view.