How To Create Groups & Segment Contacts In Mass Texting Service
Table of Contents
Groups allow you to segment your contacts so that you can send different texts to different groups of contacts. You can create an unlimited number of groups in the Mass Texting Service app and contacts can be included in more than one group. This guide will walk you through how to create groups and add contacts to groups.
How To Create Groups
You need to create groups before you can add contacts to them. To create a group, you’ll need to navigate to the groups tab by clicking the groups link in the sidebar menu on the left side of the app screen. Any groups you create will be displayed in a table view in the groups tab.
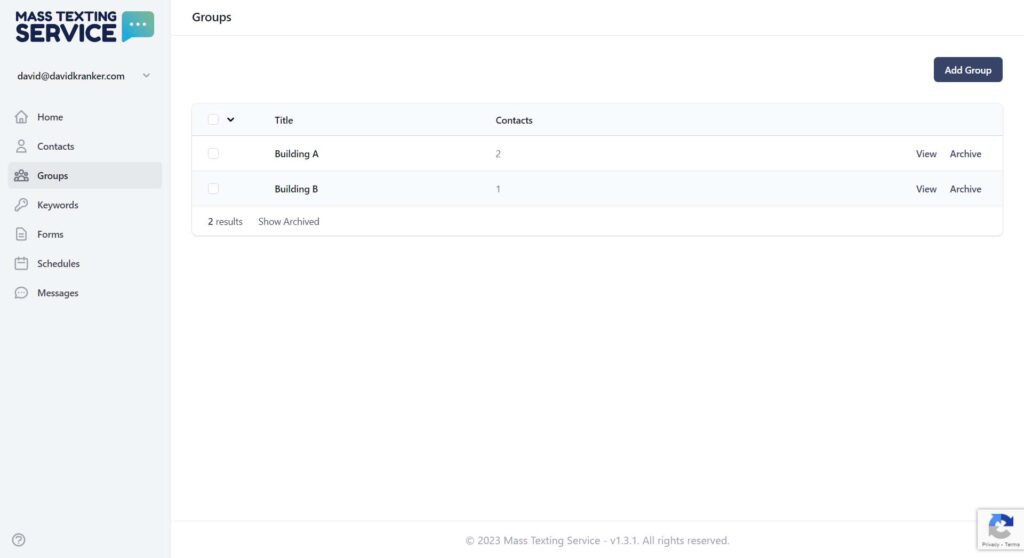
Once you’re in the groups tab, you can press the blue “Add Group” button in the top right corner of the tab view. A window will pop up with an input box for you to give your new group a title.
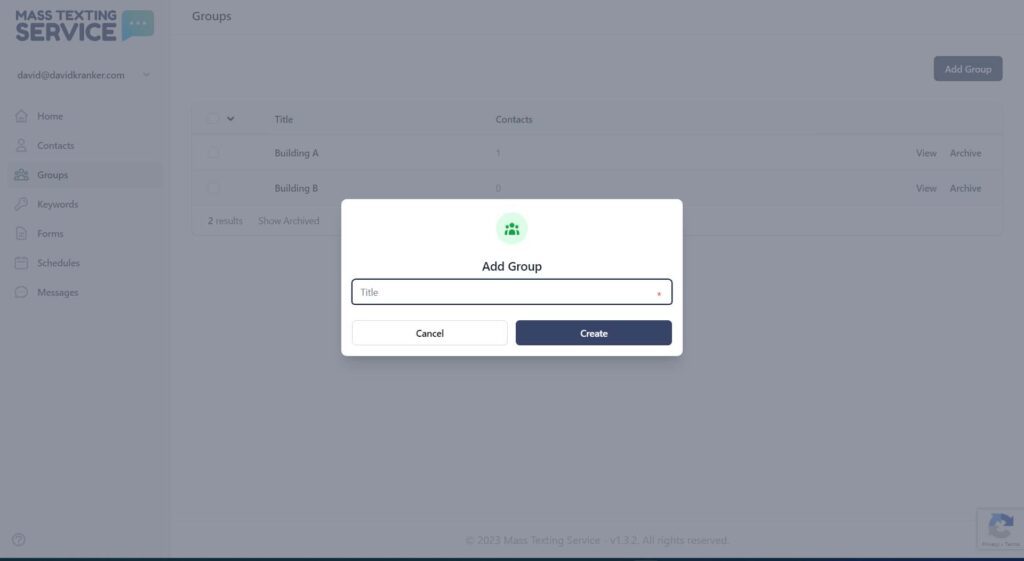
Once you’ve titled your group you can press the “Create” button to create the group.
How To Add Contacts To Groups
After you’ve created your groups, you can then add contacts to them. There are two ways to add contacts to a group. You can add contacts to groups on import via your CSV file. You can also add existing contacts to groups in the contacts tab. We’ll walk through the process for both options below.
Adding Contacts To Groups On Import
To subscribe your contacts to specific groups on import, you’ll need to make sure you have the group column added to your CSV. The easiest way to make sure your CSV is formatted properly is to use our CSV import template.
In the group column of your CSV, you’ll want to specify the title of the group you’re subscribing each contact to. Make sure the title in your CSV matches the exact title of the group in the app. Once your CSV is ready to import, you can click the “Import” button in the contacts tab and upload your file. Your contacts will then be automatically imported into the groups you specified in your file.
You can learn more about importing contacts into Mass Texting Service in our help guide on how to upload contacts.
Adding Existing Contacts To Groups
If your contacts are already in the Mass Texting App, you can still add them to new groups. You can add a single contact to a group, or add multiple contacts to a group. First, navigate to the contacts tab by pressing the contacts link in the sidebar menu on the left side of the app screen.
Each contact in the contacts table will have a checkbox next to their name. As soon as you select one contact, the search bar will be replaced with links to archive or add the selected contact/contacts to a group.
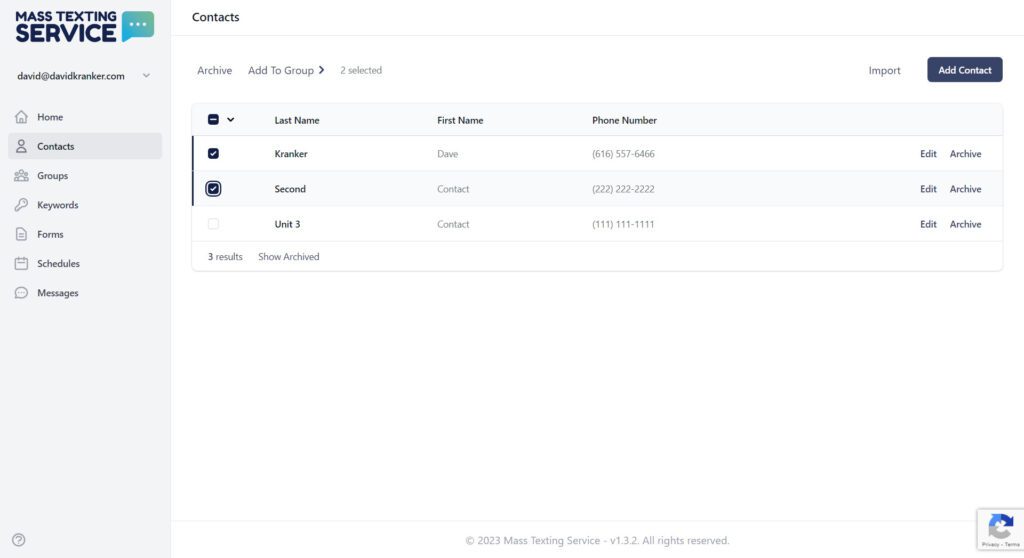
Select all of the contacts you want added to a group and then press the “Add to Group” link. A window will appear with a dropdown for you to select the group you want to add the selected contacts to.
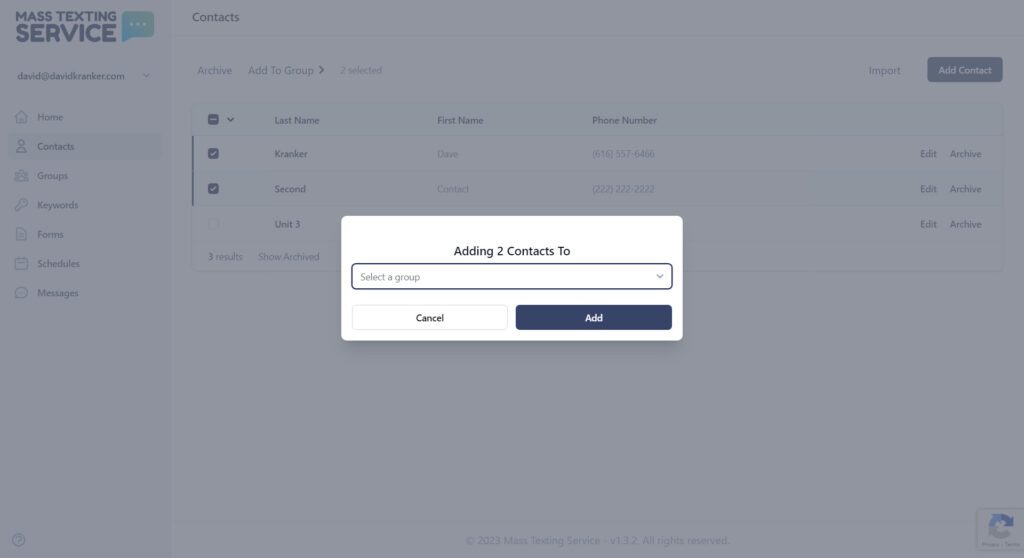
Once you’ve selected the group, you can press the “Add” button to add your contacts to the group.
Editing Groups
You can remove contacts from a group at any time in the app. To remove contacts from a group navigate to the groups tab and click the “View” link to the right of the name of the group you want to edit. When you click the “View” link you’ll be taken to a view of the selected group, which will include a table of all the contacts in the group.
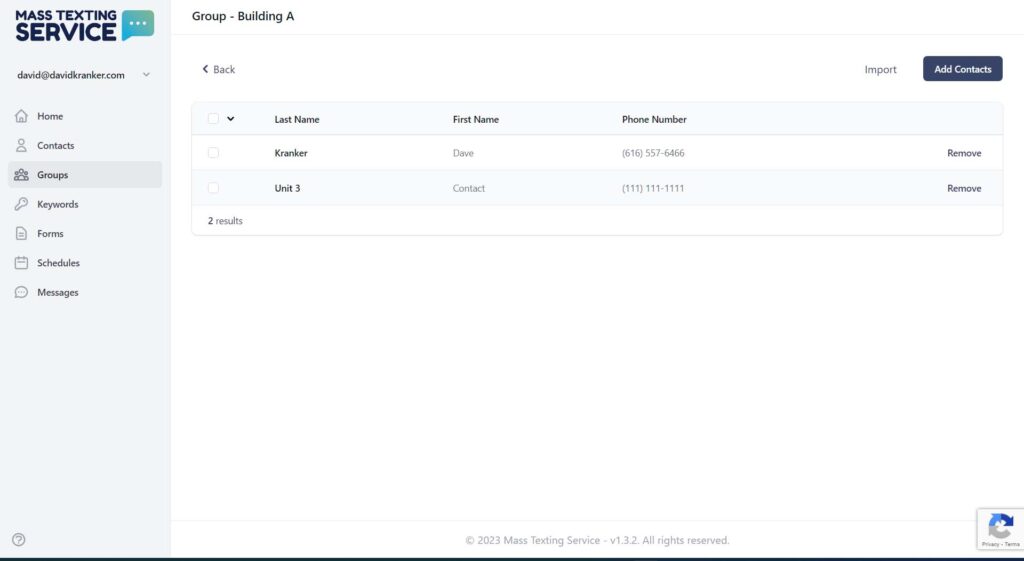
Each contact in the group table will have a “Remove” link on the right side of the table row. You can click the “Remove” link to remove any individual contact from a group. You can also bulk-remove contacts from groups by selecting multiple contacts and pressing the “Remove” link that appears at the top of the group table.